Wednesday, June 8, 2016

Janome Coverpro 1000cpx Binding Tutorial using industrial binders

IMG_0188

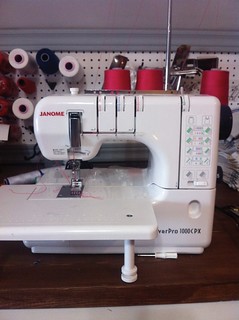
I sew with knits a lot and by alot I mean almost exclusively!. So it's no wonder I had to have a coverstitch machine. I ended up purchasing a Janome Coverpro 1000cpx coverstitch machine with a table. It's a wonderful machine for coverstitching on knit fabrics.  It is finicky with its settings and as such a little bit of a pain in the behind to learn how to bind with it.  I never purchased the original plate and binder as I felt it was insanely overpriced.
IMG_0225

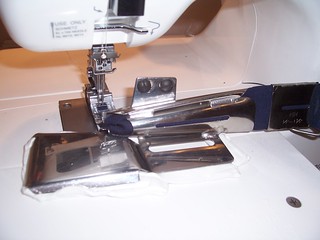
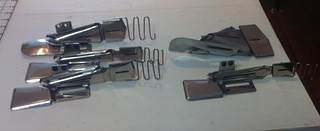
You can use industrial binders on the machine you just need a way of attaching them to the bed of the machine. You can use the original binder plate that comes together with a binder available through Janome dealers, you can buy one on ebay through Sharp Sewing Supply or through NgoSew on ebay, or you can make your own plate to hold the binder onto the machine bed or use sticky tack and adhere it to some sort of table. (Note: I've never used the plate through the dealers or sharps or Ngosew so use it at your own risk) The above photo is of the binders I own. There are different types of binders available. For our purposes we will discuss A and B binders.
Janome coverpro with generic binder

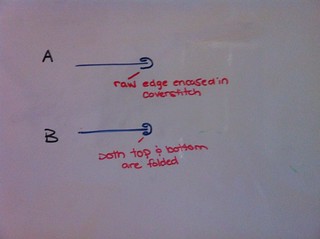
A binders are used exclusively for knit fabric as they leave a fold on the top of the binding and the underside of the binding is the raw edge that is encased in the backside of the coverstitch. It's a great choice for knits as it creates less bulk (esp. at seams). B binders double fold on both sides of the binding. I prefer using the B binders on my treadle machine using bias binding. You can use B binders on the coverstitch machine and use a chain stitch but I haven't as of yet because I'm unsure how long a chain stitch would hold up to consistent pulling esp. at the neckline.
IMG_0230

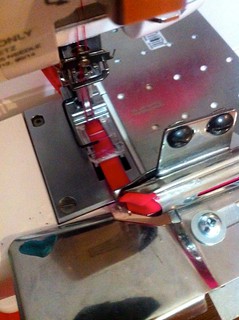
I've owned my cover pro for over 5 years now and for most of that time I used sticky tac to adhere it to the extension table. It honestly works nicely even if it's really tacky looking. Recently my children can't seem to leave my sticky tac alone and are constantly stealing it. So I changed my setup to include a metal plate I picked up at the hardware store. The holes on the metal plate were centred perfectly to match the holes of the bed of the cover pro (the first set of holes to the right of the needle). I just had to increase the size of the holes a tiny bit. I had to purchase a drill bit to drill through the metal. I used the white screws that came with the machine to adhere the metal plate to the bed of the machine. Then adhered the binder to the metal plate with bolts and screws and washers.  I honestly prefer the sticky tac the most as the binder can rest closer to the foot of the machine and it's quicker to remove and set up. I also use the clear foot for my machine as it gives me better visibility. There are various sizes in both of the A and B binders. I use the 3/8" finished A binder the most. The cut size is the size you cut the binding before it passes through the binder. I cut my binding 1 1/8". However the thinner the fabric the more you might have to cut it. a finer jersey can be cut wider and spray starch applied to it to prevent it from curling. Stabilizing it with a tricot interfacing may help and I'm currently experimenting with it. For beginners I suggest baby rib knit fabric to use as the binding material. The rib knit is just cut straight (it doesn't have to be cut on the bias) it should be cut with a rotary cutter and ruler though as it does have to be precise.

IMG_0155

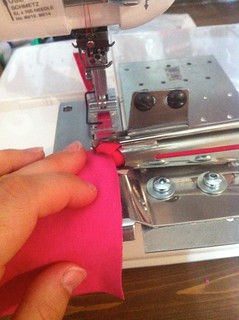
The two top screws on the binder adjust the top and bottom brackets on the binder. When lining up the binder, the bottom binder bracket should be slightly to the right of the left needle. I have my bottom bracket pushed all the way to the right (as far as it goes). The top bracket is about 1/8" to the left of the left most needle. Once you've threaded the binder and pulled it to the back, the folded binding should rest between the metal parts on the clear foot. It is very important to go slow with this setup because the binding can shift as the binder isn't as close to the foot as it should be. This is why I prefer using sticky tac to adhere it to my extension table.
IMG_0189 
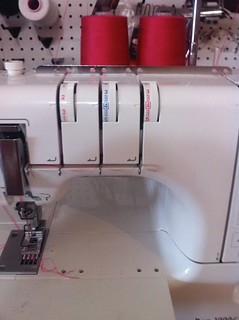
The top settings are 2.5 Orange needle and 4 blue needle. the looper is set at 3 but reduce the tension down to 1 over the seam - go slow over seams. 
IMG_0190
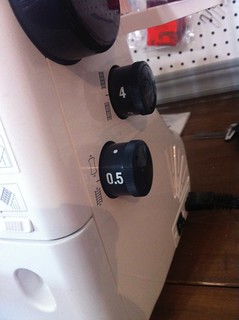
the slider is to the right and the differential feed is set to 0.5 and the stitch length 4.

IMG_0169

Always test your binder first with scrap fabric. When everything is right adhere seam stabilizer to both shoulder seams (you can use clear elastic as well to stabilize or a knit/tricot stabilizer - if using the knit/tricot stabilizer you only have to apply it to the side that touches the feed dogs so it doesn't stretch/distort the seam).  Sew/serge only 1 shoulder seam.

IMG_0156

With right side of fabric facing up put the fabric into the middle of the groove and sew the entire neckline reducing the tension of the looper down at the seam. 

IMG_0168

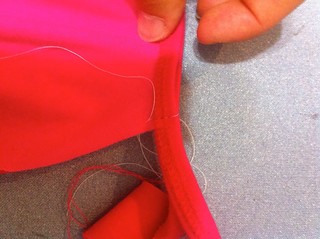
Baste the ends of the bindings (right sides together) with your sewing machine.


IMG_0171

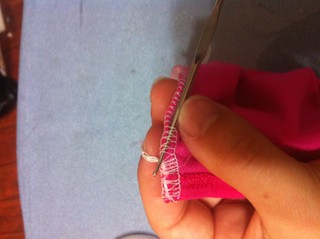
Using a small crochet hook weave in the ends and then tie a knot.

IMG_0195

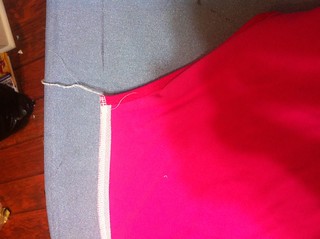
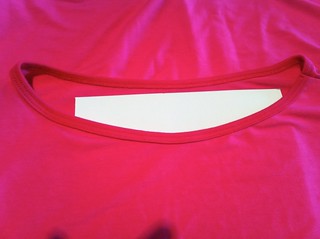
Tack down the seam you just sewed and tie off your ends.
Saturday, January 23, 2016

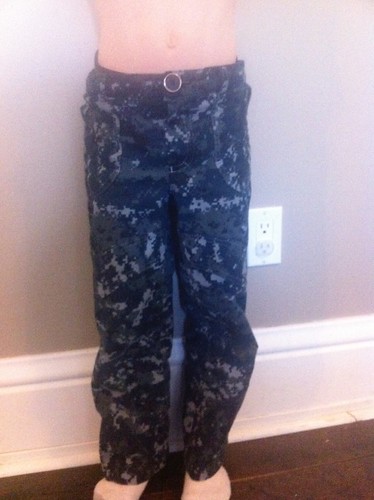
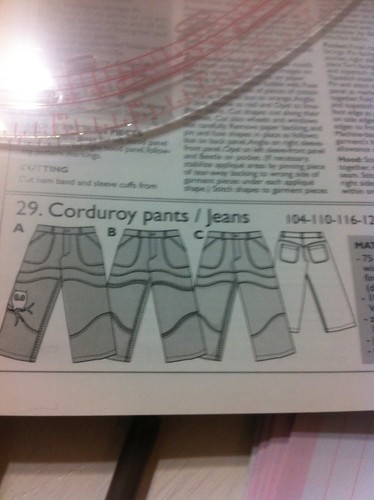
Ottobre 4/2007 #29 Corduroy Pants/Jeans

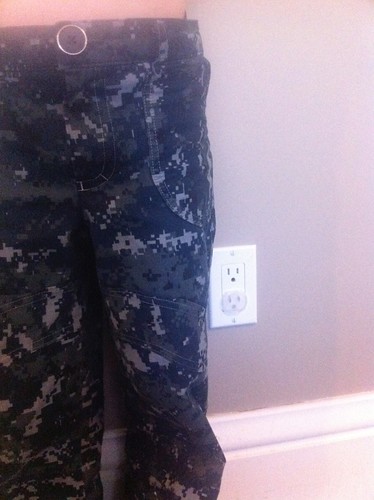
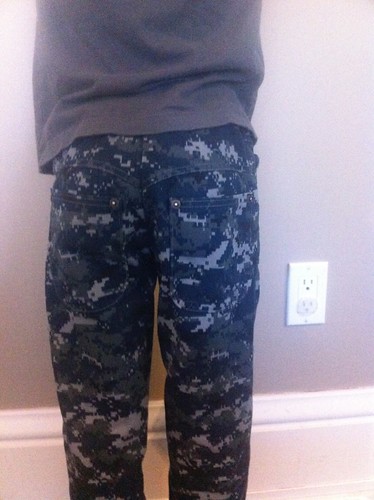
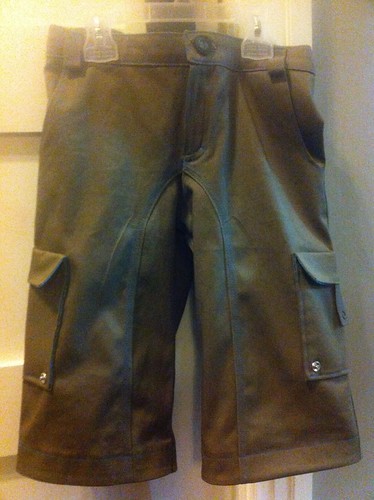
Here's some pants I made for ds#1. They were made in size 122cm with 5/8" seam allowance added. I believe I added a few 2-3" to the length so that I can lengthen them when the time comes as ds#1 is growing like a weed. The only thing I messed up on was the pocket (which I should have made 1/4" seam allowance as the 5/8" sa is to high and as a result he can't actually use the pockets. I realized after I had sewed the side seams this and at that point I wasn't willing to seam rip to fix my mistake.

IMG_3710

Here's a more unclose view of the the pocket detailing. The front leg portion has a 3 piece pattern split around the knee. I really do like the look of it especially with the corduroy as the lines add dimension to the finished pants. However its not the easiest pattern especially for a beginner. 


IMG_3711


IMG_3302


IMG_3713

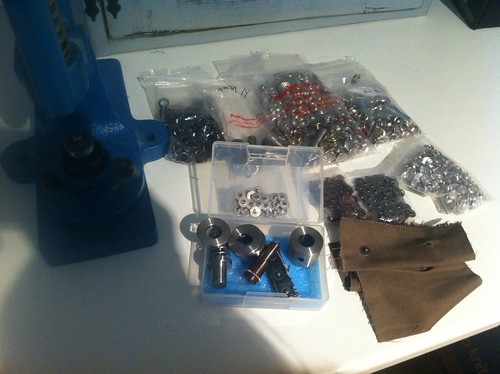
The above photo shows the beautiful topstitching of the pants that gives it a more RTW look and feel.  I used my snap press dk-98 Kam press to add the nipple rivets to. I purchased the rivets from Dot Gas which is a wholesale supplier that sells to the general public. They're prices aren't that amazing but I ran into limited options for nipple rivet dies. I live in Canada and as such shipping costs are insanely high from the US to Canada. So I purchased the dot gas adapter so my snap press can use industrial dies and then that way I can use industrial die sets in the future. The clear plastic box houses the adapter piece and the industrial die set for the dk-98 press. In future, I hope that the Grommet Mart nipple rivets will work with my press. I didn't want to have to buy another press and the dies from Grommet Mart are insanely overpriced not to mention the cost of shipping would have been  about equal to what I purchased for the adapter and rivets anyways.

I also purchased some more dies to my dk-98 from Kam Snaps. I actually originally purchased my press from them. I'm not that happy though that they are discontinuing the metal dies for the press hence the reason I purchased so many at once. I purchased the 7mm grommet die, Utility spring #20, and fashion spring #20. They are good quality dies and I do like my press just really upset with their business practice of discontinuing the dies for the machines that they carry. The good thing I learned through it all is that once you buy the die sets you can usually find the hardware for them to fit. They were out of stock on the #20 fashion spring hardware so i purchased the die and looked on ebay to find something that fit. I purchased the hardware from this guy on ebay, the price was cheap enough to see if they worked and they did plus the shipping doesn't kill you to Canada.

I have stummbled across another company that sell hardware/presses and lots more of it than Kam snaps. Goldstartool  also carries snap presses. Their die sets are cheaper and looks quite similar to the dk-93 kam snap press. It's dies are screw in not flat shank so I'd have to purchase the press. I'm seriously considering purchasing their machine and corresponding die sets as they carry a wide assortment of hardware. I can't believe the rollarcoster I've had for one machine that does it all. Sadly I don't think there's such thing especially when I still have to take into consideration the cost of the dies/hardware and their shipping costs. I don't regret buying my Kam snap press as I still have the ability to buy wholesale industrial die sets and their corresponding hardware.


IMG_3136

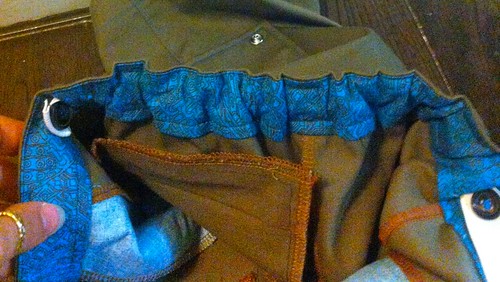
I also modified the pattern to add an adjustable waistband just like in RTW kids clothing. Below is a photo to show you what I mean. I also didn't have any button hole elastic on hand so I used knitted elastic and just slit some openings in it. I then hemmed the pants using my blind hemmer (industrial machine) so that I can easily lengthen them when ds#1 grows.


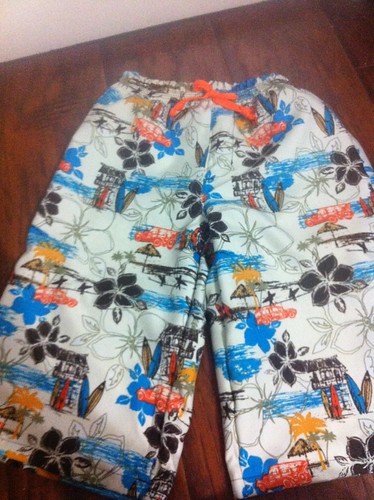
Bob Bermudas - design change


Monday, August 3, 2015

recent sewing and wood working


Bob Bermudas Ottobre 3/2012
Bob Bermudas ottobre 3/12

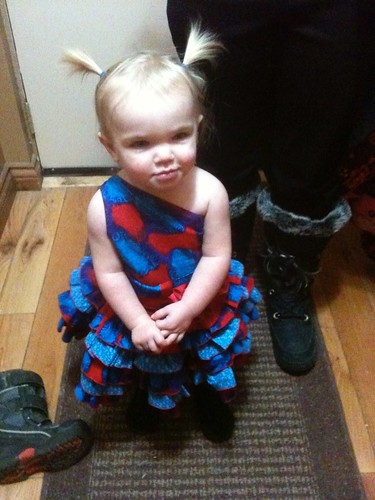
Ottobre design 2/2014 Fairy Dance
Ottobre design 2/2014 fairy dance

Ottobre 
IMG_3068

Create Kids Couture
IMG_0394

Create kids couture
Untitled

farmhouse table
hand made farm table

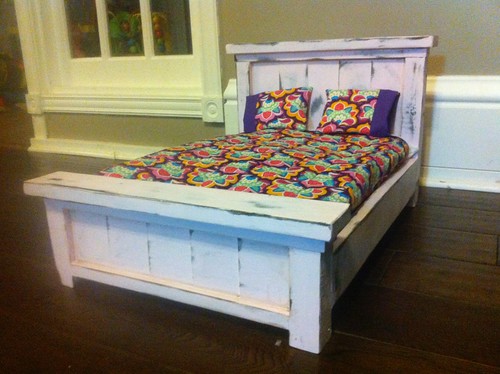
doll bed with quilt and pillows
doll bed made for niece

Ottobre
IMG_1515

IMG_1501

DS1 New bed
double farmhouse bed

Front hall shoe cabinet
hand made shoe cabinet

Ottobre
photo

Monday, October 21, 2013

what I've been up to lately...

Well, all the major renovations aside from bathrooms and outside porches have been completed thanks to my wonderful husband who's stuck by me when I just wanted to pull out my hair and his. That's not to say that there isn't work to be done just now it's my time to shine. I love to decorate and keep a tidy house but lets be realistic - since having children my house isn't as spotless as I'd like it and truth be told  I'd rather do something that doesn't get undone. So onto my project. Dh's mother's bday was at the end of August and our gift to her was a new coffee table for her living room. Using Ana whites plans I built this lovely table but there was one flaw in the plans - that the trudle box (short sides) should be shorter in length by the actual size of your 2x2 (this one protruded the depth of the 2x2). I ended up using colonial american stain for the table top and 3 coats of semi-gloss poly then I primed and painted the bottom in white with distressing to the faux fronts using a stain pen.

IMG_1245

I also finish my $20 dresser find that I got at a yard sale last year. When I brought it home dh asked me why I was buying junk. 

IMG_0784

So I went shopping for some more junk and bought this mirror for $2

IMG_0916

And together I turned them into this for a total cost of $50 in supplies (I used the crown and wood for the mirror from my scrap wood pile) I still have to decorate it but I'm planning on making my own picture frames and nick-nacs for it so this is going to have to wait for the time being

PA130003

PA110107
I also ended up sewing the jalie 2908 pattern that pr member rave about and I got to tell you that I love it. Now all I have to do is invest in  some good quality rivets because I'm not sure I will ever buy a pair of jeans again!

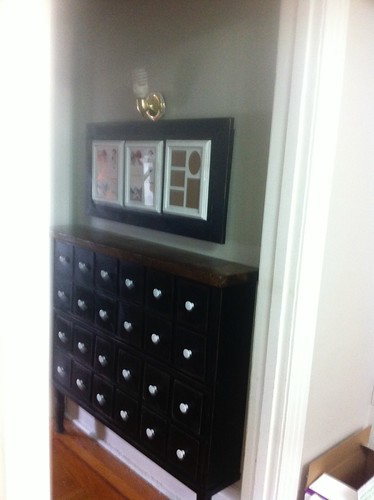
Here's a storage cabinet for my little notions which hides the fugly part storage box.
IMG_1063

IMG_1064

I also have been busy getting our front hallway done up in time for halloween.  To the left of the picture below, I made a coat rack which also serves as a photo ledge. The top of the ledge is made from door jambs which has ridges cut out which is perfect for putting pictures onto. I then stained it all in dark walnut. The curtain was a new addition to the front hallway. Now none of our neighbours can see in our house!

IMG_1254

Friday, September 27, 2013

Sew - sew - sew! Fair's a coming!

Dh has been bugging me for the past couple of years to enter some of my sewing projects into the fair, so this year I entered 5 items (to make up for all the years he's been bugging me to enter!) 

Ottobre 5/2012 #1 - first place winner
IMG_1168

here is my version of the tunic! I shortened it quite significantly - 5 inches - yes 5 inches - I guess I'm a little bit short - lol. Anyways this tunic falls just below my bum and when paired with knee high boots and leggins - it will be oh so comfortable! I used a lightweight navy linen that I purchased from fabric.com a few years ago. I also left off the pockets and zipper. I then handstitched the bottom and neck facing using white jean thread! I love this top and for less than 10$ I have a one of a kind top! A couple of months ago I also purchased a whole bunch of sewing machine feet from ebay (finally after years of having just the feet that came with my janome). One of those machine feet was a ruffler foot. I think I paid $12.00 or so for it but I can see why people like this foot and it came in mighty handy for doing this project. I enter this into our local fair and it won 1st place and a  $25 gift certificate to fabricland!

Ottobre 1/2011 #13 - Ruffled skirt (denim - centre top front) First place winner

IMG_1191

This skirt was my first ever separating zipper! The pattern is a great pattern only I think that the waistband really should have included an adjustable waist. and when I was doing the waistband facing I should have used white bobbin thread not navy blue! The next project that I do, I'm planning on using a double sided fusing tape to hold the inner facing seam allowance down so i cant topstitch the outer facing with precision - hopefully this makes the facing look cleaner.

Create Kids Couture - Elena's twirly peasant dress - with short sleeves - First place winner!
I love this pattern! It's simple and easy with a dramatic finished look! all the ruffles were hand done :/ as I hadn't received my ruffler foot yet.
I loved this pattern so much I decided to make it for my niece in less dramatic colours and entered it into a different category. It won 2nd place
IMG_1192

Ottobre 5/2010 #6 (first place)

IMG_1163
This pattern was a challenge to sew. it started with the placket - the directions for sewing it seems so confusing that i just winged it and turned the corners more rounded then square. i know i clipped them wrong but for the life of me i can't figure out how i was supposed to do it. then of course the facing was a nightmare - facings i just can't master yet! I ended up hand stitching the inner facing then top stitching from the front!

I am really happy with the results and plan on entering again next year!

Monday, July 29, 2013

Angry bird pjs

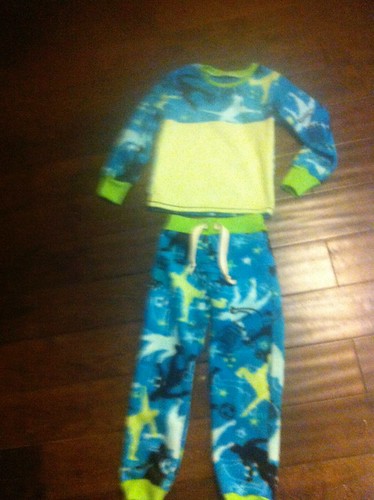
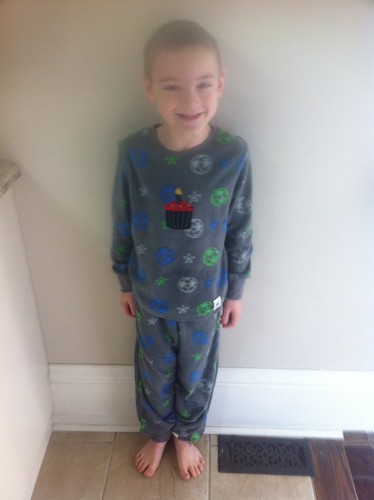
Its been over a year since i've sewn anything for the boys but I'm happy to finally have a sewing room backds#1 has been asking for a new pair of pjs for at least 6 months now (ever since the start of the attic reno) so when I told him he could design his own pjs he was ecstatic - of course I had to make ds2 and ds3 a pair too - I found the angry bird online for free and then just formatted it have two of them. These pjs took me almost 2 weeks to make (because dd4 won't go to bed any earlier than 10) but the smiles on my sons faces when they realized they have a ''pee-pee hole" was priceless, it had them in stitches for over 1/2 hour saying mama look at my dingle dangle. I used ottobre 6/2010 #14 for the pants and #18 for the shirts leaving off the sleeve overarm patch because i wanted to use my binder for the neckline - i hate working with this rib knit in my coverstitch machine using my binder - the first time i thought it was just inexperience in using the machine but now I think it's the fabric - i guess that what you get for buying it in the clearance section and not knowing the content of the fabric.

P7290270

ottobre 6/2010 angry bird pjs

Wednesday, July 17, 2013

Threading a Consew 75T blind hemmer / blind stitch machine

Back in December I purchased a blind stitch machine. Now some maybe wondering why on earth I would need another machine for blind stitching when my sewing machine already has a blind hem stitch on it. Well at the time of making my curtains I practiced on scrape fabric to see if in fact my domestic machine would be able to sew through the layers - as I suspected it wouldn't as with any domestic you have to flip over the fabric in order for it to do a blindhem stitch - I could have done it by hand but we were talking about yards of blind heming here and I wasn't up for the that. So I purchased the consew 75t for $100. For the price, I love the machine - it wouldn't go over the extremely bulky parts of my curtains (double folded and interlined and lined ) but I knew that when I purchased it, so i just did these parts by hand. So the difference between a true blind hem machine /stitch machine is that it only uses one thread to make a blind hem instead of the domestic machine which uses the thread and a bobbin thread. A domestic sewing machine stitches 3 straight stitches then a zig-zag.  This one difference makes ripping it out extremely easy and it looks way more professional in my opinion. If I didn't have so many layers I probably would have just used my sewing machine but I do love my blind hem machine and wouldn't give it up - as for anything sewing related - professional results are achieved with the right tool for the job.

blind hem sides

Here is a quick video of how to thread the machine too!