
I sew with knits a lot and by alot I mean almost exclusively!. So it's no wonder I had to have a coverstitch machine. I ended up purchasing a Janome Coverpro 1000cpx coverstitch machine with a table. It's a wonderful machine for coverstitching on knit fabrics. It is finicky with its settings and as such a little bit of a pain in the behind to learn how to bind with it. I never purchased the original plate and binder as I felt it was insanely overpriced.
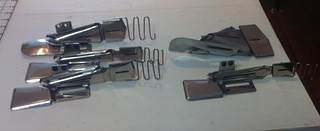
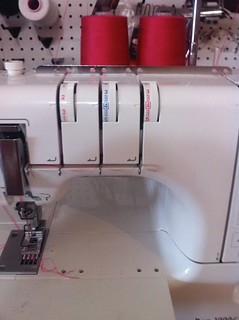
You can use industrial binders on the machine you just need a way of attaching them to the bed of the machine. You can use the original binder plate that comes together with a binder available through Janome dealers, you can buy one on ebay through Sharp Sewing Supply or through NgoSew on ebay, or you can make your own plate to hold the binder onto the machine bed or use sticky tack and adhere it to some sort of table. (Note: I've never used the plate through the dealers or sharps or Ngosew so use it at your own risk) The above photo is of the binders I own. There are different types of binders available. For our purposes we will discuss A and B binders.
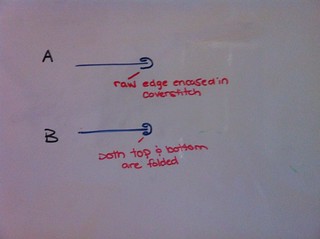
A binders are used exclusively for knit fabric as they leave a fold on the top of the binding and the underside of the binding is the raw edge that is encased in the backside of the coverstitch. It's a great choice for knits as it creates less bulk (esp. at seams). B binders double fold on both sides of the binding. I prefer using the B binders on my treadle machine using bias binding. You can use B binders on the coverstitch machine and use a chain stitch but I haven't as of yet because I'm unsure how long a chain stitch would hold up to consistent pulling esp. at the neckline.
I've owned my cover pro for over 5 years now and for most of that time I used sticky tac to adhere it to the extension table. It honestly works nicely even if it's really tacky looking. Recently my children can't seem to leave my sticky tac alone and are constantly stealing it. So I changed my setup to include a metal plate I picked up at the hardware store. The holes on the metal plate were centred perfectly to match the holes of the bed of the cover pro (the first set of holes to the right of the needle). I just had to increase the size of the holes a tiny bit. I had to purchase a drill bit to drill through the metal. I used the white screws that came with the machine to adhere the metal plate to the bed of the machine. Then adhered the binder to the metal plate with bolts and screws and washers. I honestly prefer the sticky tac the most as the binder can rest closer to the foot of the machine and it's quicker to remove and set up. I also use the clear foot for my machine as it gives me better visibility. There are various sizes in both of the A and B binders. I use the 3/8" finished A binder the most. The cut size is the size you cut the binding before it passes through the binder. I cut my binding 1 1/8". However the thinner the fabric the more you might have to cut it. a finer jersey can be cut wider and spray starch applied to it to prevent it from curling. Stabilizing it with a tricot interfacing may help and I'm currently experimenting with it. For beginners I suggest baby rib knit fabric to use as the binding material. The rib knit is just cut straight (it doesn't have to be cut on the bias) it should be cut with a rotary cutter and ruler though as it does have to be precise.
You can use industrial binders on the machine you just need a way of attaching them to the bed of the machine. You can use the original binder plate that comes together with a binder available through Janome dealers, you can buy one on ebay through Sharp Sewing Supply or through NgoSew on ebay, or you can make your own plate to hold the binder onto the machine bed or use sticky tack and adhere it to some sort of table. (Note: I've never used the plate through the dealers or sharps or Ngosew so use it at your own risk) The above photo is of the binders I own. There are different types of binders available. For our purposes we will discuss A and B binders.
A binders are used exclusively for knit fabric as they leave a fold on the top of the binding and the underside of the binding is the raw edge that is encased in the backside of the coverstitch. It's a great choice for knits as it creates less bulk (esp. at seams). B binders double fold on both sides of the binding. I prefer using the B binders on my treadle machine using bias binding. You can use B binders on the coverstitch machine and use a chain stitch but I haven't as of yet because I'm unsure how long a chain stitch would hold up to consistent pulling esp. at the neckline.
I've owned my cover pro for over 5 years now and for most of that time I used sticky tac to adhere it to the extension table. It honestly works nicely even if it's really tacky looking. Recently my children can't seem to leave my sticky tac alone and are constantly stealing it. So I changed my setup to include a metal plate I picked up at the hardware store. The holes on the metal plate were centred perfectly to match the holes of the bed of the cover pro (the first set of holes to the right of the needle). I just had to increase the size of the holes a tiny bit. I had to purchase a drill bit to drill through the metal. I used the white screws that came with the machine to adhere the metal plate to the bed of the machine. Then adhered the binder to the metal plate with bolts and screws and washers. I honestly prefer the sticky tac the most as the binder can rest closer to the foot of the machine and it's quicker to remove and set up. I also use the clear foot for my machine as it gives me better visibility. There are various sizes in both of the A and B binders. I use the 3/8" finished A binder the most. The cut size is the size you cut the binding before it passes through the binder. I cut my binding 1 1/8". However the thinner the fabric the more you might have to cut it. a finer jersey can be cut wider and spray starch applied to it to prevent it from curling. Stabilizing it with a tricot interfacing may help and I'm currently experimenting with it. For beginners I suggest baby rib knit fabric to use as the binding material. The rib knit is just cut straight (it doesn't have to be cut on the bias) it should be cut with a rotary cutter and ruler though as it does have to be precise.
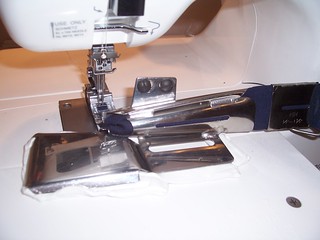
The two top screws on the binder adjust the top and bottom brackets on the binder. When lining up the binder, the bottom binder bracket should be slightly to the right of the left needle. I have my bottom bracket pushed all the way to the right (as far as it goes). The top bracket is about 1/8" to the left of the left most needle. Once you've threaded the binder and pulled it to the back, the folded binding should rest between the metal parts on the clear foot. It is very important to go slow with this setup because the binding can shift as the binder isn't as close to the foot as it should be. This is why I prefer using sticky tac to adhere it to my extension table.
The top settings are 2.5 Orange needle and 4 blue needle. the looper is set at 3 but reduce the tension down to 1 over the seam - go slow over seams.

the slider is to the right and the differential feed is set to 0.5 and the stitch length 4.
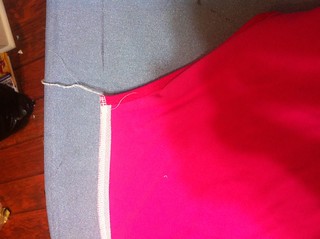
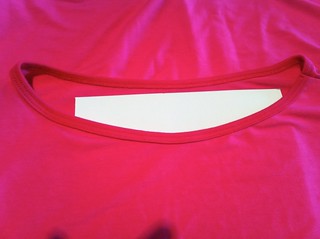
Always test your binder first with scrap fabric. When everything is right adhere seam stabilizer to both shoulder seams (you can use clear elastic as well to stabilize or a knit/tricot stabilizer - if using the knit/tricot stabilizer you only have to apply it to the side that touches the feed dogs so it doesn't stretch/distort the seam). Sew/serge only 1 shoulder seam.
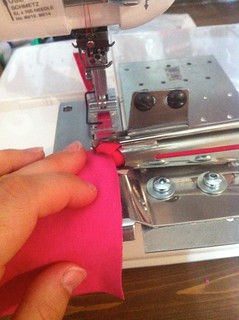
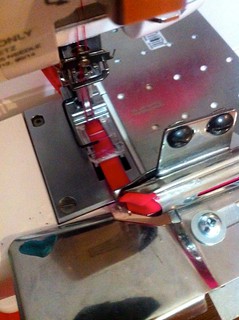
With right side of fabric facing up put the fabric into the middle of the groove and sew the entire neckline reducing the tension of the looper down at the seam.
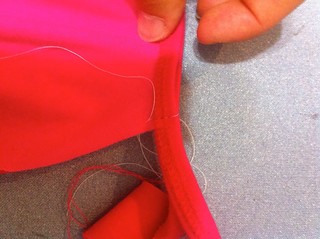
Baste the ends of the bindings (right sides together) with your sewing machine.
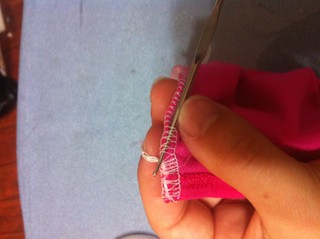
Using a small crochet hook weave in the ends and then tie a knot.
Tack down the seam you just sewed and tie off your ends.
This was extremely helpful to me- especially with the dearth of information on binding on the cover pro available. Thank you!
ReplyDeleteYour welcome!
Delete